Wednesday, July 16, 2025

Braised Oxtail from Candice Kitchen

 https://candice-kitchen.blogspot.com/2014/04/vol-1-by-lc-risotto-22-cm-lc-petite.html?m=0&fbclid=IwY2xjawLkz1tleHRuA2FlbQIxMABicmlkETF0N3F6d0FWU3I5V1p0WDdZAR7r_oaj0cNA_bVNhnneN25eTRXtn1w_2STFXGHMinWDflR9rVWewcLv3ebADQ_aem_7zY7zNSemXKra4_gqhr9Ng


放工回家也要煮大餐 Vol. 1:法式紅酒燉牛尾伴心心飯 (附食譜) By LC Risotto 22 cm & LC Petite Heart Casserole

每一次要挑戰「放工回家也要煮大餐」系列,都是戰戰競競。

回到家已經是晚上8時了,我卻喜歡向高難度挑戰,做一些在周末周日烹調較合適的菜式,一來要看看honey會否等到肚子也餓壞 (如果心情及體力狀態俱佳,他等待是可以的,但要有小食讓他一邊等一邊充飢),也要看一看我在有限時間內是否可以完成,像在參加Master Chef,非常刺激。

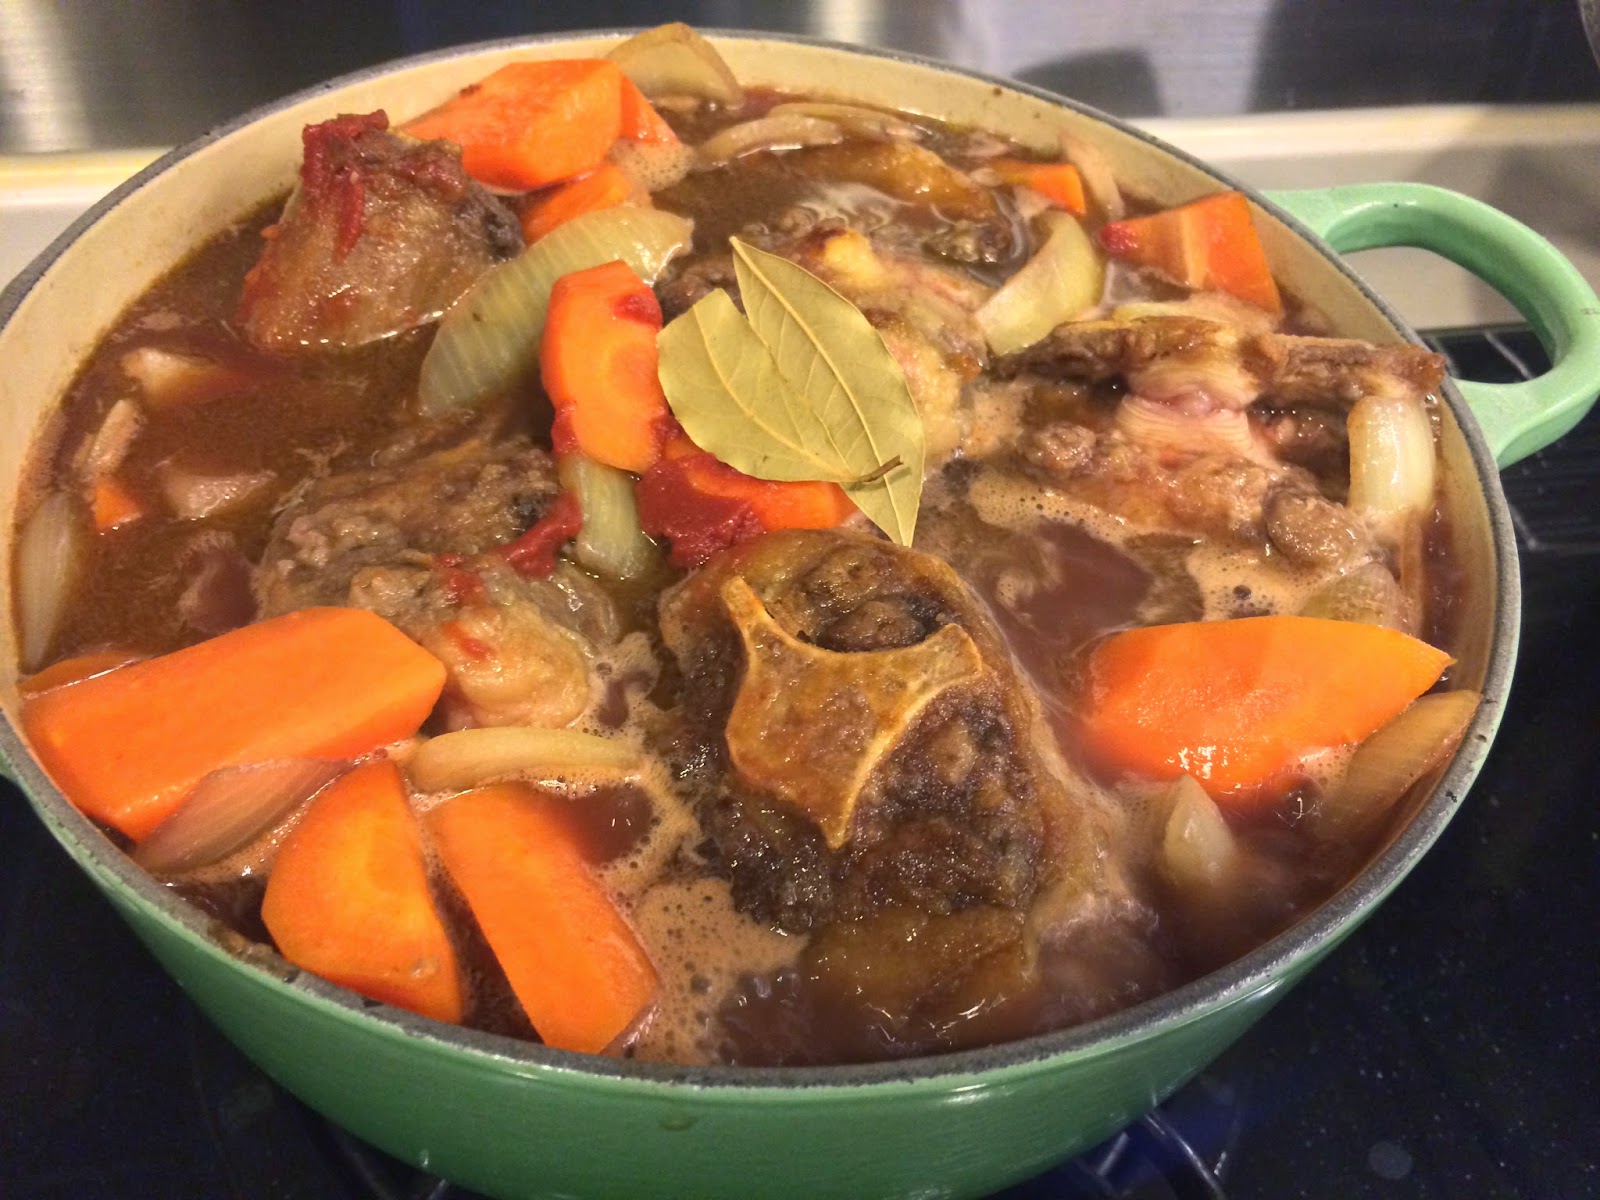
今晚我居然要煮牛尾,這個是honey一直渴望嘗試的主菜,然而我煮了這麼多,卻沒有做過這一個。(小時候可能聽得太多關於這個牛尾的鬼故吧,哈哈) 為了這個微不足道的承諾,我卻跑去燉牛尾。

最後晚上10時半才開飯,換來卻是honey說了超過30次的好吃,以及用行動極速消滅整碟飯來証明它的美味程度,縱使我要洗碗清潔至深夜(完成這個系列是很酷的事,但代價也很高!!) 看見他興奮的表情,還會覺得有一絲絲的甜,值得的值得的!
  

材料:(4人份量)
急凍牛尾……………………..…約2磅
洋蔥……………………………1 1/2個
甘筍…………………………..……2條
麵粉………………………………適量
雞湯……………………………..500ml
紅酒…………………………..約150ml
清水………………………………適量
茄膏(半小罐)…………..…….…約70g 
月桂葉…………………………….2片
牛油…………………………..….少許
白飯……………………………....2碗

在梁九記買的急凍南美牛尾
 

1)      把甘筍和洋蔥洗淨後去皮,分別切件及切片待用

2)      牛尾解凍後抹乾水

3)      用碟盛著適量的麵份,放上牛尾,前後兩面撲上麵粉

4)      下油,油滾起煙,小火下牛油,牛油融化後,
放入已沾上麵粉的牛尾

5)      把兩邊煎至香口金黃色,約20分鐘,盛起待用


6)      預備另一個鍋子,下油,油滾起煙,中火,爆香洋蔥

7)      加入甘筍炒勻

8)      放入已煎香的牛尾

9)      倒入紅酒炒勻。如喜歡酒味濃郁一點,
可隨意多加一點紅酒

10)  倒入雞湯和拌入茄膏。
如有需要,或水份不夠,可加入適量的清水一齊煮。


11)  放入月桂葉,把所有的材料及醬汁以中火煮滾

紅酒,用最便宜小枝的入廚就可以,方便使用。

月桂葉及茄膏,超市有售


12)  醬汁煮滾後,加蓋以中慢火燉煮2個半至3個小時,
期間需隔30分鐘開蓋拌一拌以防痴底。


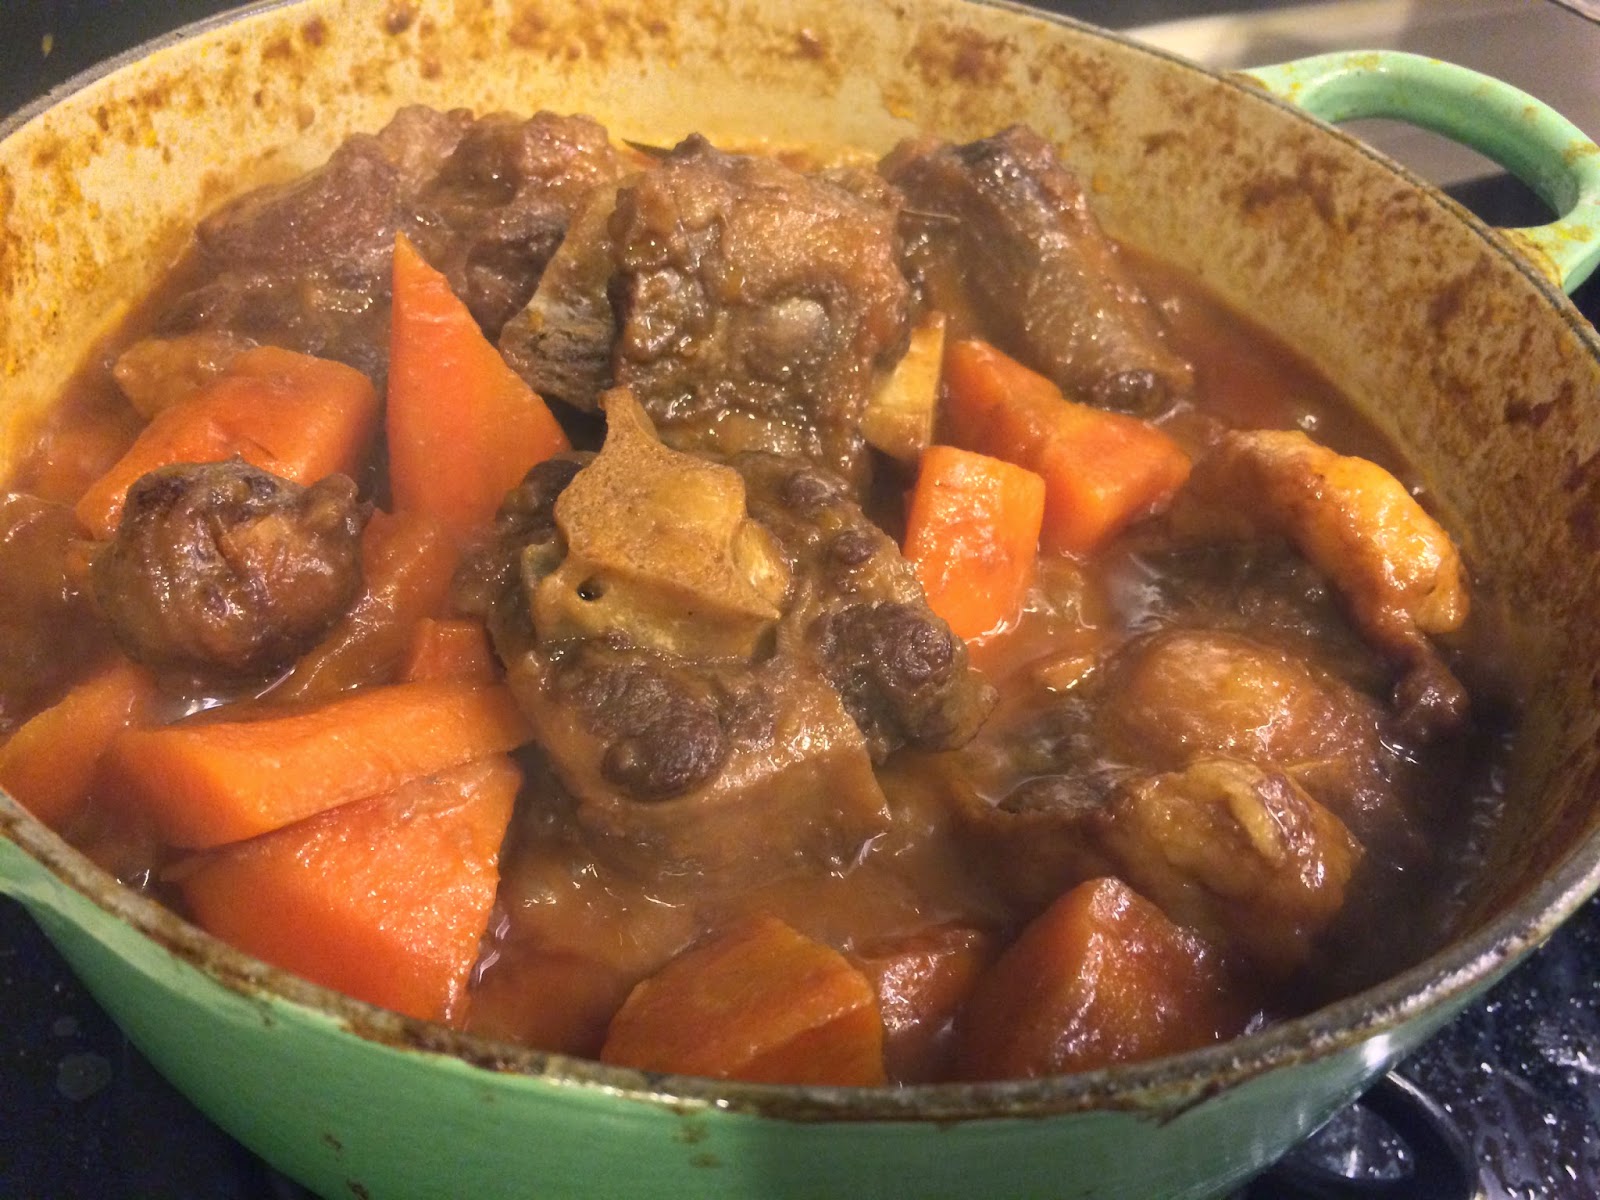
13) 煮至牛尾及配菜至軟身,醬汁變濃郁杰身即成。


心心飯做法也很簡單啊,
只需用LC Petite Heart Casserole就幫到手

把飯盛入,用飯勺壓實一點,倒出來,就是可愛的心心飯了。
用其它心形模具幫手也可以。


法式紅酒燉牛尾伴心心飯愛心登場

honey一見到這個燉牛尾,還要有個很可愛的心心飯,開心到興奮大叫,我在拍照的時候,已經吃掉一整碟還叫添飯!

時間關係,我只燉了兩個半小時,有時間的話,
燉3個小時是最理想的。

真的很好吃哇~~醬汁全是牛尾的濃郁精華,
甘筍甜甜的,入味到不得了

牛尾的營養價值很高,含有豐富的蛋白質,尤其含有較多的膠質,燉煮後美味非凡,肉質又很有彈性,
是一道美味又營養豐富的主菜。 


這道菜,成功進佔honey心中的No. 1了,
打倒了加菲貓很愛吃的肉醬千層麵,成為皇者。

在我眾多美食之中脫穎而出,牛尾大哥,確是厲害厲害!

Tuesday, July 15, 2025

Chicken Salad With Lemon-Sesame Dressing

Chicken Salad With Lemon-Sesame Dressing

NY Times 

This main-dish salad is inspired by chicken larb, which is a dance of contrasts: light but rich, with tender meat, crunchy vegetables and seasonings that span sour, sweet, spicy and savory. This recipe dresses lean-but-juicy ground chicken or turkey with sesame oil, fresh lemon, miso, ginger, basil and celery, but there are many ways to adapt it: You could sauté crumbled tofu or cubed salmon instead of the chicken; or add yuzu kosho, wasabi paste or fried garlic. It’s good on its own, or with roasted potatoes, grains, salad greens, soba noodles or wrapped in nori.


Yield: 4 servings

1 tablespoon plus 1½ teaspoons toasted sesame oil, plus more for serving

1 pound ground chicken or turkey

Kosher salt (such as Diamond Crystal)

Freshly ground black pepper

¼ cup white or yellow miso

1 large lemon, zested and juiced (about 1 tablespoon zest and 3 tablespoons juice)

1½ inches fresh ginger, peeled and chopped (about 2 tablespoons)

3 celery stalks, thinly sliced, leaves reserved

1 cup basil leaves, large ones torn in half

2 tablespoons black or white sesame seeds, or a combination (or furikake)


In a large (12-inch) skillet, heat 1 tablespoon sesame oil over medium-low. Add the chicken, ½ teaspoon salt and ½ teaspoon pepper, and cook, breaking up into small pieces, until opaque and just cooked through, 3 to 6 minutes. (You’re not looking to brown the meat here, which would risk drying it out.) Remove from heat to cool.

In a large bowl, stir together the miso, lemon zest and juice, ginger and 1½ teaspoons sesame oil.

When the chicken is no longer hot (warm or cool both work), use a slotted spoon to add it to the bowl with the dressing, leaving any chicken juices behind. Stir to combine. Add the sliced celery, celery leaves, basil and sesame seeds; stir to combine. Taste, and if it needs more spice, add black pepper; if it’s bland, add salt; if it’s dry, add sesame oil. Eat warm or at room temperature. (Leftovers will keep for up to 2 days in an airtight container in the refrigerator.)


No-Churn Salted Caramel Ice Cream

No-Churn Salted Caramel Ice Cream

Melissa Clark - NY Times 

Yes, you can make excellent ice cream without an ice cream machine — and with just two ingredients. This salted caramel version has a buoyant, velvety texture thanks to whipped cream and gets toasty butterscotch notes from prepared dulce de leche, a richly complex substitute for the more commonly used sweetened condensed milk. Adding a pinch of flaky sea salt to some of the dulce de leche before swirling it into the ice cream base gives the whole thing crunchy, savory pops, balancing out the sweetness. And if you want to go one step further, swirling in a few tablespoons of chopped nuts, shredded coconut or chocolate chips along with the dulce de leche adds texture as well as flavor.


Yield: 1½ pints

1 (14-ounce) can or jar dulce de leche

1 ½cups heavy cream

¼ teaspoon fine sea salt

½ teaspoon flaky salt (optional)


Pour or spoon about ¾ of the dulce de leche from the can into a small bowl (save the remaining dulce de leche for swirling). In a large bowl, using a whisk or electric mixer, beat heavy cream and fine sea salt until stiff. Add a dollop of the whipped cream to the small bowl, and mix until the dulce de leche has loosened.

Add the lightened dulce de leche mixture to the bowl of whipped cream, gently folding until combined.

Add remaining dulce de leche to the now-empty small bowl and season with flaky salt (or you can substitute ¼ teaspoon fine salt, but you won’t have the crunch).

In a quart-size container, add a quarter of the dulce de leche whipped cream. Dollop in a few small spoonfuls of salted dulce de leche on top and swirl gently. Repeat until all of the whipped cream and dulce de leche are transferred. Freeze until firm, at least 3 hours or overnight.


Tip: If you can’t find dulce de leche at your local grocery, you can easily make your own by simmering, for 3 hrs, an unopened can of sweetened condensed milk in a pot of water. Keep it covered by an inch or so of water! (No, it won’t explode.) Remove from hot water bath and bring to room temp. It stores indefinitely, so make several. Can’t wait? Open a can, scoop out 1/3 cup and top with whipped cream. I’ve made it this way for many years.

I have made condensed milk based ice creams in a Cuisinart ice cream machine. I just mix the heavy cream and condensed milk together. I add it to the machine, no whipping necessary. Since dulce de leche is just caramelized condensed milk, this method should work well.


Monday, July 14, 2025

Summer Pasta With Zucchini, Ricotta and Basil

Summer Pasta With Zucchini, Ricotta and Basil

NY Times

A summer pasta should be simple and fresh, ideally made with vegetables straight from the garden or market. Look for the best artisanal ricotta; top-quality ingredients make all the difference here.


Yield: 4 to 6 servings

Extra-virgin olive oil

1 small onion, finely diced

2 pounds zucchini, sliced into ¼-inch-thick pieces (for larger zucchini, cut in half lengthwise before slicing)

Salt and pepper

2 garlic cloves, minced, or 2 tablespoons chopped green garlic

1 ounce basil, about 2 cups loose leaves

1 pound ziti or other dry pasta

8 ounces ricotta, about 1 cup (see recipe)

Pinch of crushed red pepper

Zest of 1 lemon

2 ounces grated Parmesan, pecorino or a mixture, about 1 cup, plus more for serving


Put a pot of water on to boil. In a large skillet over medium-high heat, cook the onions in 3 tablespoons olive oil until softened, 5 to 8 minutes. Reduce heat as necessary to keep onions from browning. Add zucchini, season generously with salt and pepper, and continue cooking, stirring occasionally until rather soft, about 10 minutes. Turn off heat.

Meanwhile, use a mortar and pestle to pound garlic, basil and a little salt into a rough paste (or use a mini food processor). Stir in 3 tablespoons olive oil.

Salt the pasta water well and put in the pasta, stirring. Boil per package instructions but make sure to keep pasta quite al dente. Drain pasta, reserving 1 cup of cooking water.

Add cooked pasta to zucchini in skillet and turn heat to medium-high. Add ½ cup cooking water, then the ricotta, crushed red pepper and lemon zest, stirring to distribute. Check seasoning and adjust. Cook for 1 minute more. Mixture should look creamy. Add a little more pasta water if necessary. Add the basil paste and half the grated cheese and quickly stir to incorporate. Spoon pasta into warm soup plates and sprinkle with additional cheese. Serve immediately.

Tip: This is a very versatile dish, that can be adapted to a number of variations. I'd suggest cooking the garlic with the onions (it won't burn, you're sweating everything) and to halve and core the zucchini before slicing - makes them less watery in the finished dish. I'd also brown the zucchini to give the dish more crunch. If you don't have or like ricotta, use good farmer cheese or even a soft goat brie or feta and Romano. Any way you make it following the basic instructions will be delicious!

I've made this twice. What I've found is that combining the ricotta, red pepper flakes and zest separately in a large bowl along with just enough pasta water produces a nice smooth sauce. Next, the basil paste can be added and then the drained pasta. Stir to coat the pasta with the sauce. Finally, add this mixture to the zucchini/onion pan and stir to combine and add the grated cheese last. This produces a more consistent dish with all the pasta well coated with the sauce.


Sunday, July 13, 2025

Nutella Brownies

Nutella Brownies

NY Times

These dreamy four-ingredient Nutella brownies are assembled in less than five minutes. Nutella is the recipe’s workhorse, rendering obsolete the need for sugar, leavening and fat. Instead, the magical combination of chocolate-hazelnut spread, a little flour, a couple of eggs and a generous dash of salt, results in the fudgiest, chewiest and easiest of Nutella brownies. If a simpler brownie recipe exists, we have yet to be introduced.


Yield: One 8-inch pan

Non-stick cooking spray

1½ cups/442 grams chocolate hazelnut spread (such as Nutella)

2 large eggs, room temperature

¾ teaspoon kosher salt (such as Diamond Crystal)

⅓ cup/43 grams all-purpose flour


Heat the oven to 350 degrees. Grease an 8-inch square baking pan, preferably metal (see Tip), with non-stick cooking spray and line with a long sheet of parchment paper that extends over two opposite sides of the pan.

Whisk the Nutella, eggs and salt in a large bowl until smooth. Gently fold in the flour with a flexible spatula, just until the last streak disappears.

Scrape the batter into the prepared pan and bake for 22 to 25 minutes, rotating at the halfway point, until crackly-topped and slightly puffed. A wooden skewer or cake tester inserted in the center should come out just clean. Try not to overbake, as these brownies dry out quickly.

Let cool to room temperature before lifting the brownies from the pan with the paper overhang, slicing into 9 squares and serving. Brownies will keep tightly wrapped at room temperature for up to 3 days and in the freezer for up to a month.


Tip: Glass does not conduct heat as well as metal, so it can cause baked goods to cook unevenly and requires an increase in cook time. If using a glass pan, increase the bake time to 37 to 40 minutes, and expect some variation in texture.

*Personally, I’d maybe do a touch less salt. I made these with a glass pan (I really need a metal one)! At 22 minutes, they were still raw, they were done at 35. My other tip: oil your whisk and liquid measuring cup (for the Nutella) with non-stick spray — it makes everything easier.

Butter Mochi

Butter Mochi - Genevieve Ko

Tender and chewy, this big-batch dessert — as comforting as cake and as fun as bar cookies — is always a hit at parties. Mochiko, sweet rice flour, not only gives it its distinctive marshmallow-like softness, but it also lends a natural sweetness. This version of butter mochi uses only coconut milk for its richness and subtle nutty taste, but you can substitute equivalent amounts of whole milk, evaporated milk or a combination of those liquids. Butter mochi develops a crackly top that stays crunchy the day it’s baked, making it a delicious dessert to eat without adornment. But, if you’d like more crunch, you can sprinkle dried shredded coconut evenly over the top before baking, or, for a tangy, colorful top, you can coat it with the passion fruit glaze below. (Watch the video of Genevieve Ko making butter mochi here.)


Yield: 1 (9-by-13-inch) cake

For the Mochi

6 tablespoons/84 grams unsalted butter, melted and cooled, plus more for greasing the pan

3 cups/453 grams mochiko (sweet rice flour), like Blue Star brand

2 teaspoons baking powder

½ teaspoon fine sea salt

4 large eggs

2 cups/416 grams granulated sugar

2 (13.5-ounce) cans unsweetened coconut milk (scant 3½ cups)

1 tablespoon pure vanilla extract

For the Passion Fruit Glaze (optional)

1½ packed cups/219 grams confectioners’ sugar

2 to 4 tablespoons passion fruit pulp or purée (see Tip)

Pink or red food coloring (optional)


Make the mochi: Heat the oven to 350 degrees. Lightly butter a 9-by-13-inch cake pan, then line the bottom and sides with parchment paper.

Whisk the mochiko, baking powder and salt in a medium bowl. Prepare the batter in a stand mixer or in a large bowl with an electric hand mixer or whisk: Whisk the eggs and sugar until pale yellow and thick. Continue whisking while pouring in the coconut milk, then the butter and vanilla. Continue whisking while gradually adding the mochiko mixture. Whisk until the batter is completely smooth. Pour into the prepared pan, then tap it against the counter to get rid of any air bubbles.

Bake until golden brown and crackly, 1 hour 15 minutes to 1½ hours. When you press the center, it should bounce back but not indent at all. Cool completely in the pan on a wire rack. Use the parchment paper to slide the cooled mochi out of the pan.

The mochi is delicious plain, but you can add a glaze if you’d like: Mix the confectioners’ sugar with 2 tablespoons passion fruit pulp until smooth. It should be thick but drippy. If needed, add another 1 to 2 tablespoons pulp. If you’d like to create an ombré or sunset effect, scrape some into another bowl or multiple bowls and tint with food coloring. Spread the glaze evenly over the mochi, in stripes if you’d like, and let stand until set.

Cut the mochi into squares or bars. Serve immediately, or keep in an airtight container at room temperature for up to 3 days.


Tip: You can buy pure passion fruit purée from specialty markets and some grocery stores in the frozen fruit section. If you can’t find the fruit or purée, you can substitute passion fruit juice or nectar, but it will be much sweeter. To prepare passion fruit pulp from fresh fruit, halve 2 fruits and scrape the pulp into a small microwave-safe bowl or saucepan. Warm by microwaving for 15 seconds or heating on low until loose and runny. Press through a sieve to extract the pulp from the seeds.

Halved recipe, but with only 3/4 c sugar, added a tsp of coconut extract and un-toasted unsweetened shredded coconut on top and it is AMAZING!! Took 1 hr in an 8x8” metal pan. Covered it loosely with foil halfway thru to keep from getting too brown.

I have made this twice now- but the first time used Bob’s red mill “white rice flour” and the result was surprisingly similar to a vanilla poundcake baked with wheat flour. Just baked one this morning using “glutinous rice flour” from Thailand, and resulting cake is what I was first expecting- the bouncy gummy texture one finds in mochi items. Just as a mochi novice, wanted to share! P.s. I also halved this recipe with great results, same baking time, and subbed 1/2 whole milk with xtra butter

* Made the recipe exactly as written and it is SO incredible. A couple of nuances that really worked for me:

- Melt your butter first so it has time to cool

- Use room temperature eggs (I took mine out of the fridge and soaked them in warm water for a few minutes)

- Sift the dry ingredients

- When adding the dry ingredients to the wet, really do this gradually to avoid lumps

- Once poured into the pan, slam the pan on the counter several times to remove as much air as possible from the batter


Masala Chickpeas With Tofu and Blistered Tomatoes

Masala Chickpeas With Tofu and Blistered Tomatoes

NY Times

Like a warm and gentle nudge, masala spice gives onions and chickpeas a distinctively comforting heartiness. Glimmering with droplets of ghee, they become rich in this any-season dish. Tearing the tofu allows for ample crooks and crannies that cradle and accentuate the aromatic goodness of the spice. Cherry tomatoes, slightly and delicately blistered, are welcome as juicy bursts of acidity in every bite. Serve this over rice, or with a gently poached egg, along with a few slices of lime for squeezing.


Yield: 2 to 4 servings

1 (14-ounce) block firm or extra-firm tofu, drained

3½ tablespoons ghee or vegetable oil

Salt and black pepper

1 large red onion, finely chopped, some saved for garnish

1 (2-inch) piece fresh ginger, finely grated

2 garlic cloves, finely grated

1 teaspoon ground tandoori masala (homemade or store-bought)

1 (15-ounce) can chickpeas, rinsed

1 pint cherry tomatoes

¼ cup fresh mint or dill leaves, chopped, plus more leaves for garnish

Lime wedges, for serving


Slice the tofu in half horizontally and place on a clean kitchen or paper towel to dry.

Set a 10-inch skillet over medium heat and add 1 tablespoon ghee. Once the ghee begins to shimmer, season both sides of the tofu with salt and pepper, place in the pan and sear without moving until the tofu is browned, about 4 minutes. Turn the pieces over and brown the other side, 4 to 5 minutes more. Transfer the tofu to a plate.

Add 2 tablespoons ghee to the same skillet and heat over medium until shimmering. Add the onion (saving some for garnish) and cook, stirring often, for 4 minutes, or until translucent. Add the ginger, garlic and masala spice and season generously with salt and pepper. Stir for 1 to 2 minutes, or until fragrant.

Stir in the chickpeas and cook for 3 minutes, or until the chickpeas begin to sizzle.

Turn the heat up to medium-high, add the remaining ½ tablespoon ghee, then add the tomatoes and 1 teaspoon salt. Cook without stirring until the tomatoes are just beginning to pop open and the chickpeas are warmed through, 4 to 5 minutes. Stir in the mint.

Break the tofu into 1-inch pieces and toss in the skillet to coat with chickpea-tomato mix. Cook for another 2 to 3 minutes, or until warmed through. Remove from heat, taste and adjust seasonings, if necessary. Garnish with remaining chopped raw onions and a few leaves of fresh mint. Serve with lime wedges for squeezing.


Tips: I made this as a sheet pan, tossing chickpeas, onions, pressed tofu pieces and some bell pepper slices with the spice mix, ginger garlic and some oil. Then baked at 450 for 15 minutes . After agitating the contents of the pan and tossing in the tomatoes I put it all back in for another 10 minutes. Finished with lime and dill. It was very easy and delicious.

Under seasoned as written—I ~doubled the masala, ginger, and garlic, plus added chili flakes and turmeric, after which it was much better!

Linguine With Zucchini, Corn and Shrimp

Linguine With Zucchini, Corn and Shrimp

NY Times

This super fast and super easy summer pasta recipe barely cooks peak-season corn and zucchini, maintaining their freshness and crunch while highlighting their vibrant flavor. This  same quick-cooking method is applied to the shrimp, which keeps its bite by spending little time in the pan. (While corn and zucchini turn mushy if overcooked, shrimp turns tough and rubbery.) Finishing off this summer pasta is a shower of fresh basil and mint, which cling to each glossy strand of linguine. Feel free to add whatever vegetables and herbs catch your eye at the market. This pasta is best eaten al fresco. 


Yield: 4 to 6 Servings 

Kosher salt and black pepper

1 pound linguine or other long pasta 

1 pound medium shrimp, peeled, deveined and tails removed (about 20 shrimp)

4 tablespoons unsalted butter

4 tablespoons olive oil

6 garlic cloves, minced

1 medium shallot or ½ medium onion, minced 

Red-pepper flakes 

1 large zucchini, cut into ¼-inch rounds, then each round cut into quarters 

2 cups corn kernels (2 to 3 large ears)

¼ cup chopped fresh mint, for garnishing 

¼ cup chopped fresh basil, for garnishing


Step 1: In a large pasta pot, bring salted water to a boil. Add pasta and cook according to the packaging directions until al dente. Reserve 1 cup of pasta water, then drain the pasta and return it to the pot.

Step 2: Meanwhile, pat the shrimp dry with a paper towel and season with salt. In a separate large pot, melt 2 tablespoons of butter into 2 tablespoons of olive oil over medium high. Add shrimp in a single layer and cook until just opaque, about 2 minutes per side. Use tongs or a slotted spoon to extract shrimp and set aside.

Step 3: Maintaining medium-high heat, add the garlic, shallot and a pinch each of salt, black pepper and red pepper, stirring constantly until the garlic is fragrant and shallot is translucent, about 3 minutes. Add zucchini and cook, stirring occasionally, for about 4 minutes. Add corn along with the remaining 2 tablespoons olive oil and a pinch of salt; stir to coat. Cook until the corn is bright yellow and warm, about 2 minutes. Be careful not to overcook the vegetables, they should maintain their crispness.

Step 4: Add pasta to the pot with the vegetables, followed by the shrimp, ½ cup of the reserved pasta water and the remaining 2 tablespoons of butter. Stir to combine, reheating the shrimp while creating a glossy sauce, for about 90 seconds. Remove from heat and add chopped mint and basil and stir. Adjust seasonings to taste. Serve immediately.


TIPS: A suggestion for prepping your zucchini: Cut it in half from top to bottom, then use a grapefruit spoon to scoop out the pulp and seeds from the center and discard, as you would remove the center of a melon or squash. Slice the zucchini and sauté as per the instructions. Removing the seeds and watery pulp intensifies the flavor of the zucchini and makes it easer to get a little of that Maillard reaction browning around the edges.

Fantastic recipe (pasta, shrimp, fresh corn, zucc and more)+ great suggestions from NYT readers = 5 Stars! Used 3/4 lb. pasta, added 1 pint of halved cherry tomatoes, 1/4 t red pepper flakes, 1 T lemon juice, zest of 1 lemon, splash of white wine to deglaze the pan at Step 3.

Jalapeño-Corn Dip

Jalapeño-Corn Dip

NY Times

This much-loved and often devoured rich and spicy molten dip can be found at parties and potlucks across the Midwest and South. The heat from the jalapeños is present but tamed by sweet corn kernels, cream cheese, sour cream and melty Monterey Jack. While two jalapeños might seem like a lot, keep in mind that they’re seeded (feel free to leave the seeds in one or both if your palate favors spice — after all, the chiles are part of the dip’s draw). Frozen corn makes this a year-round dish, but of course, fresh kernels work just as well if the vegetable happens to be in season. Bacon can be omitted for a vegetarian version; in this case, skip to step 2, adding an extra tablespoon of oil and stirring in a teaspoon of smoked paprika for a hint of smoke.


Yield: 8 servings

4 ounces bacon, diced (4 to 5 slices)

1 tablespoon olive oil

4 cups frozen regular sweet corn, from 2 (10- to 12-ounce) packages (no need to thaw), or 3½ to 4 cups fresh kernels

4 scallions, trimmed and thinly sliced, whites and light greens separated from dark greens

4 garlic cloves, finely chopped

2 jalapeños, seeded and chopped

1 teaspoon chili powder, plus more for serving

1 (4-ounce) can diced mild green chiles

Salt

8 ounces cream cheese, cut into pieces

¼ cup mayonnaise

¼ cup sour cream

1 lime, halved

1½ cups shredded Monterey Jack or pepper Jack cheese (6 ounces)

Tortilla or corn chips, for serving


Heat broiler with a rack positioned closest to the heat source. Add bacon to a dry (10-inch) broiler-safe skillet and cook on the stove over medium heat, stirring occasionally, until starting to crisp, 5 to 7 minutes. Using a slotted spoon, transfer bacon to a plate.

Add oil to the skillet. Stir in frozen corn, scallion whites and light greens, garlic, jalapeños and chili powder. Cook on medium, stirring occasionally, until corn is hot and everything starts to soften, 3 to 6 minutes. Stir in green chiles and ¾ teaspoon salt; cook for 1 minute.

Turn down the heat to low. Add cream cheese, mayonnaise, sour cream and juice from half the lime. Cook, stirring constantly, until the cream cheese is melted, about 2 minutes. Stir in 1 cup of the Monterey Jack until melted, and then stir in the cooked bacon. Taste and add more lime and salt, if desired. Scatter the remaining Monterey Jack on top.

Broil the dip until the top is golden, keeping an eye on it the entire time, 1 to 2 minutes. Remove from the broiler and cool for a few minutes, then sprinkle the scallion greens and more chili powder on top. Serve hot with tortilla chips for dipping.

Ceviche

Ceviche

NY Times

Light and bright, vibrant and punchy, ceviche involves marinating raw seafood in citrus juice until it becomes opaque and toothsome. You’ll find many variations of the dish in coastal Latin America made with ingredients like coconut milk, ketchup and green olives. This colorful rendition is one style popular in Mexico, but if you leave out the tomatoes, cucumber and avocado, you’ll get a dish that’s common in Peru, the birthplace of ceviche. Whatever version you make, start with fish that’s as fresh as possible; ask your fishmonger what’s best for ceviche that day, and to make shrimp ceviche, see Tip.


Yield: 4 to 6 servings

1 pound very fresh, firm fish, such as bass, snapper or fluke, skin removed, cut into ½-inch pieces

Salt

½ cup fresh lime juice (from 4 juicy limes)

2 medium tomatoes, cut into ½-inch pieces

2 Persian or mini seedless cucumbers, cut into ¼-inch pieces

¼ medium red onion, coarsely chopped and rinsed under cold water

2 jalapeños, seeded and finely chopped

1 large avocado

¼ cup chopped cilantro leaves and tender stems

Tortilla, plantain or sweet potato chips; tostadas; or Saltines, for serving

In a wide, shallow bowl, toss the fish with 1 teaspoon Diamond Crystal kosher salt or a heaping ½ teaspoon fine sea salt until dissolved. Add the lime juice and stir to coat. Add the tomatoes, cucumbers, red onion, jalapeños and a pinch of salt; stir to combine.

Cover with plastic wrap and refrigerate for 10 to 45 minutes, stirring about every 5 minutes. This timing is dependent on preference; the longer you leave the fish in the citrus, the more “cooked” and opaque it will be (longer than 45 minutes could end up dry and chewy, like a well-done steak), whereas a shorter marinade will result in fish that is opaque and firm on the outside and soft and juicy inside, like a medium-rare steak.

When ready to serve, remove the pit from the avocado and dice into ½-inch pieces. Add the avocado to the ceviche and gently stir to coat in the lime juice, then drain off the liquid from the bowl. Stir in the cilantro and season to taste with salt. Serve spooned onto tortilla, plantain or sweet potato chips, tostadas, or Saltines.


Tip: For shrimp ceviche, it’s advisable to par-cook the shrimp before marinating it in lime juice. Bring a medium saucepan of salted water to a boil, then turn off the heat. Add 1 pound large, peeled and deveined shrimp, and cook in the hot water until just opaque, 1 to 2 minutes. Transfer to a cutting board until cool enough to handle, then coarsely chop and proceed with the recipe.

* I recommend marinating the fish separate from the veggies and draining the lime juice used to cook it. You'll notice this lime juice will turn milky and will have a stronger fishy flavor. You can then add the fish to the veggie mixture, add more lime toss well, and let the flavors marinate and come together for a few minutes before serving. This makes all the flavors in your ceviche shine and avoids a fishy sauce. Also, please do not use jalapeños (smh). Serranos! Always serranos!

*OMG, I do exactly this - draining and replacing the lime juice and I posted it above. It's def the way to go. I also temper the onion by rinsing it in hot water so it becomes sweeter. Sometimes I add a tablespoon of red wine vinegar to reach the right level of acidity.


Corn Casserole

Corn Casserole Here is a from-scratch version of the classic corn casserole, a popular holiday side dish in the southeastern United States t...